We know that line following robots moves on a specified “line”. But how do they know where the line is?
Come in IR sensors!
Line following robots uses electronic devices called IR sensors to detect the line they have to follow.
Let’s understand how they work.
Understanding the Logic
An IR sensor consists of 2 LEDs: one which transmits the IR light and one which receives the IR light. When the IR rays are transmitted, they bounce from the nearest surface and get back to the receiver LED. That's how an IR sensor detects an object.
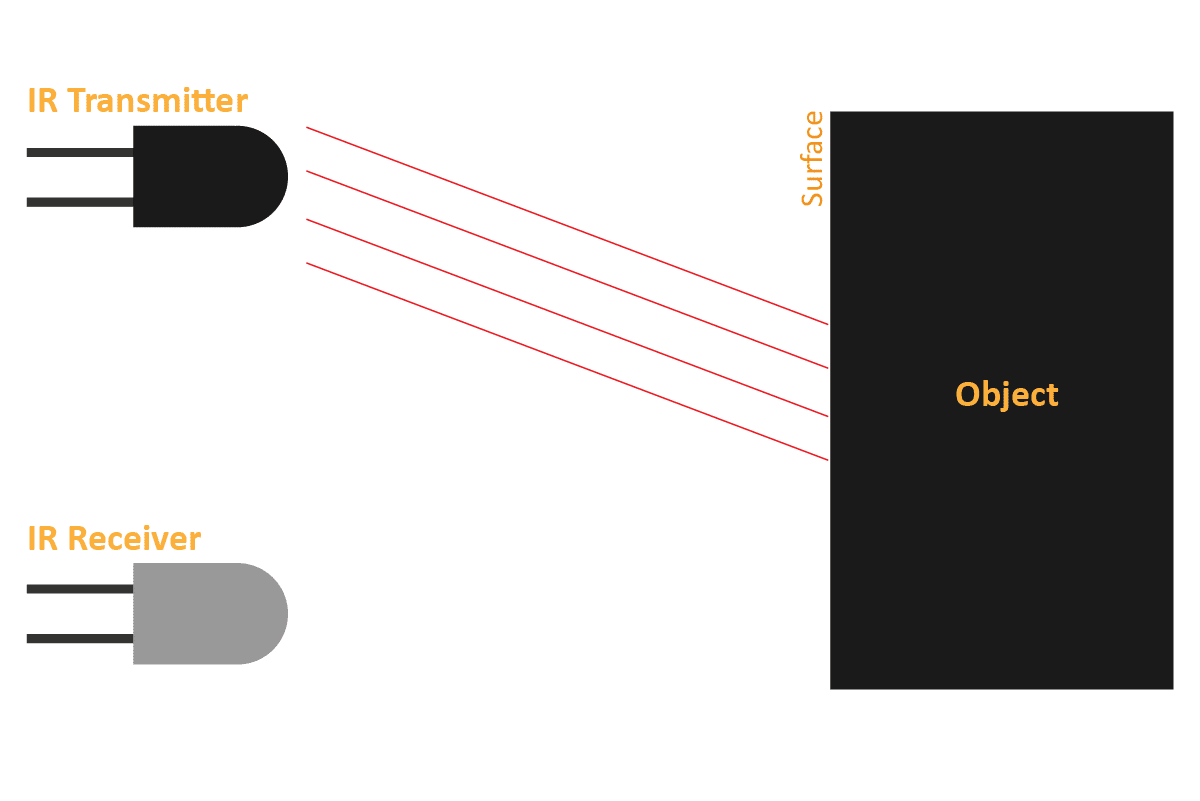
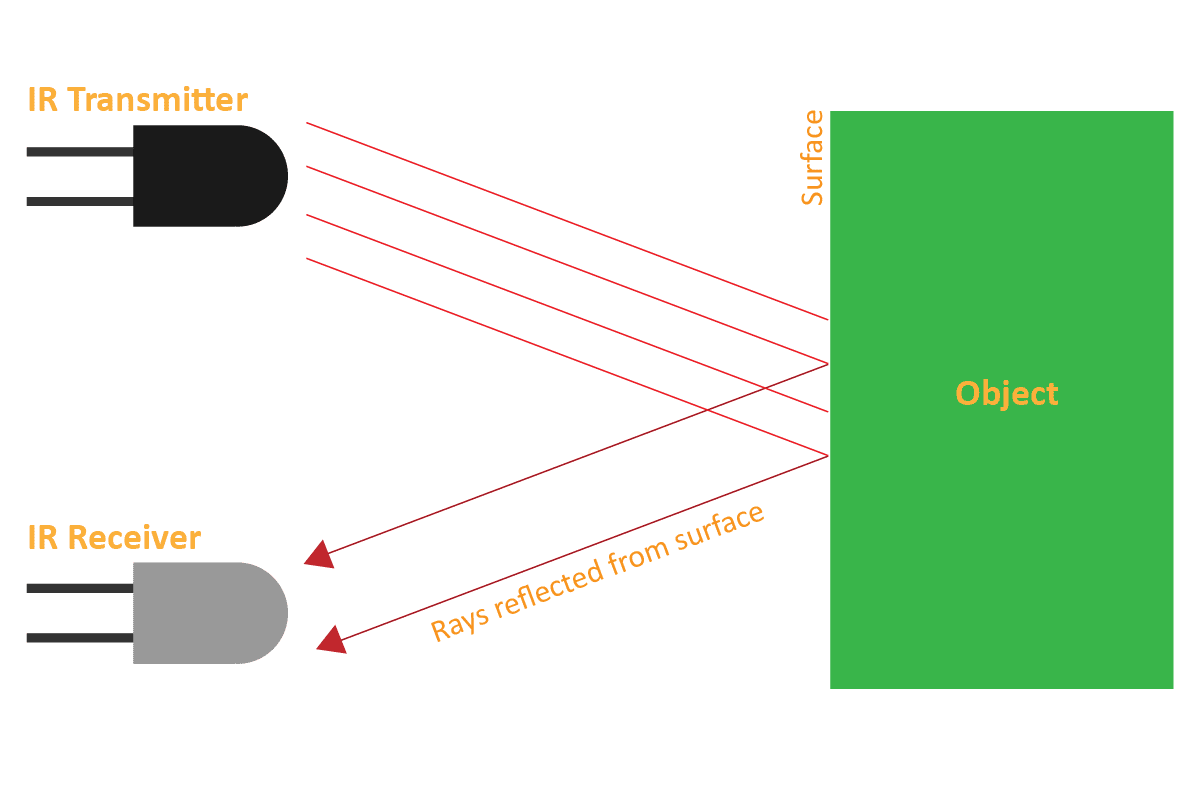
But to detect colors, we depend on the number of rays the surface reflects:
The dark surface will absorb more IR rays and as a result, the receiver will get fewer IR rays.
White or shiny objects will absorb fewer IR rays and as a result, the receiver will get more IR rays.
We can get the sensor values in PictoBlox and based on that value we can estimate whether the surface is black or white.
If the sensor detects the black line, its output value is increased. This means that the sensor is active.
If it detects the white area, its output value decreases. This means that the sensor is inactive.
We will call the threshold value above which the sensor detects the black line. If the sensor value is less than the threshold, it means that the sensor hasn’t detected the line yet.
Before we start using our line following robot, we need to first calibrate the IR sensors, i.e. make sure they’re working fine. For that, we’ll make a script in PictoBlox to calibrate them. We’ll connect Quarky to PictoBlox and find out the threshold value for its IR sensors.
IR sensors DON’T work in sunlight. IR rays from the sun increase the overall threshold of the sensors therefore they stay active all time. A closed environment or nighttime is the place/time to work with your line following robot.
Let's Code!
Finding the Threshold Values
Open a new project by selecting New from File.
Connect Quarky to PictoBlox as shown in the previous lesson.
Go to the Variablespalette and create a variable named Sensor Value.
Next, make the following script to keep updating the variable value to the left IR sensor value.
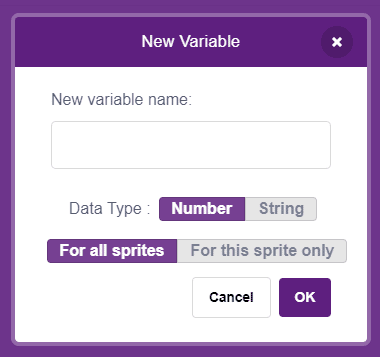
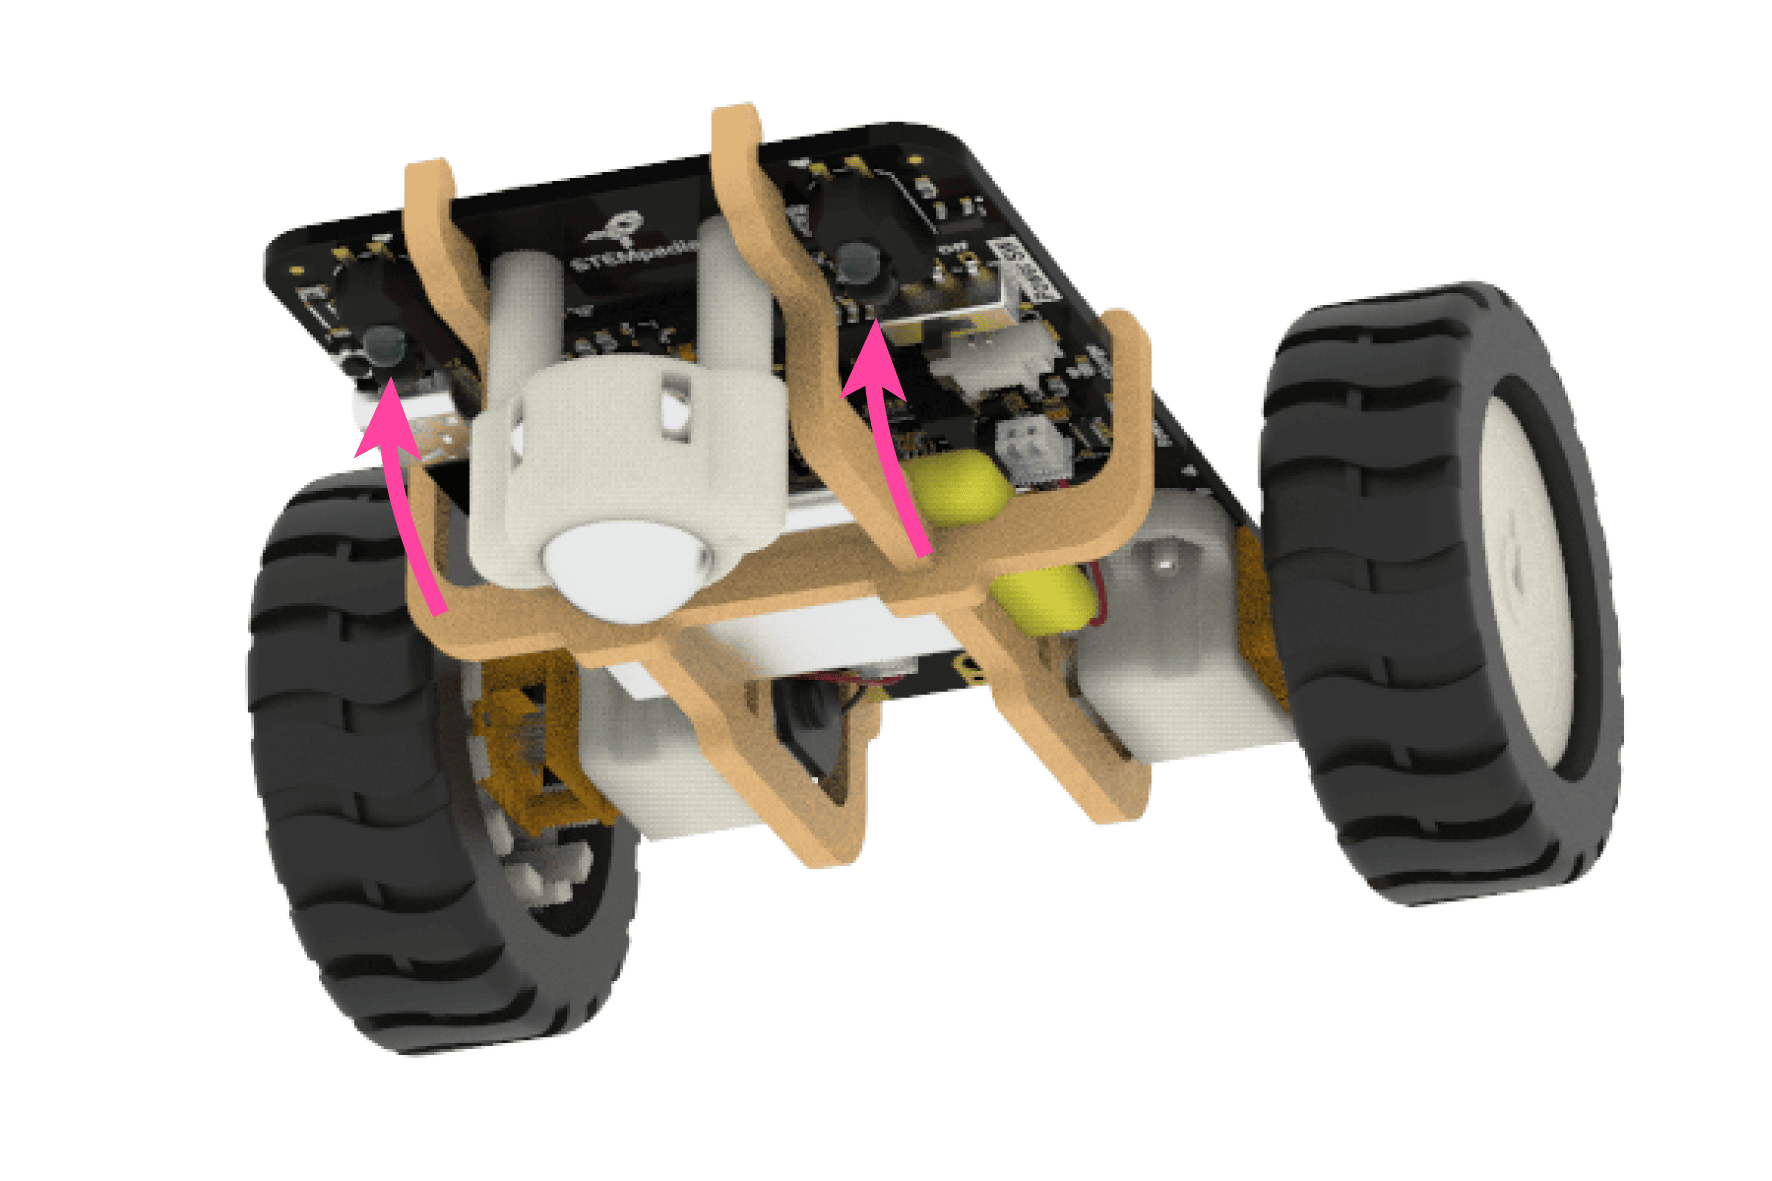
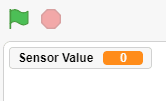
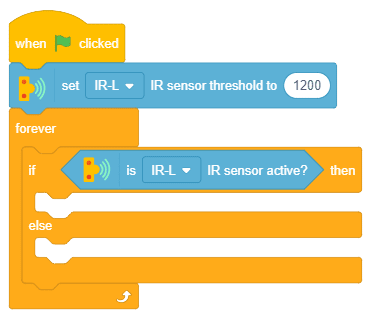
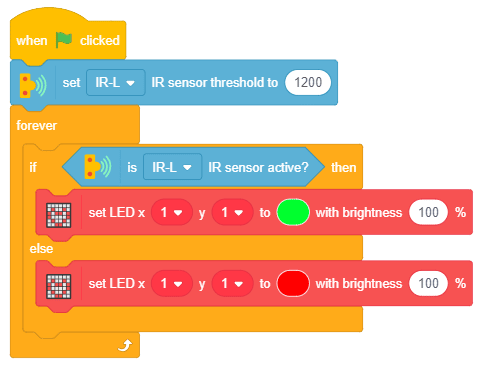
You will notice that it appears in the top-left corner of the stage. We’ll use this variable to find out the threshold value for our IR sensors.
Let’s first find out the threshold value of the first IR sensor, i.e. the Left Sensor.
Take out the track from your Quarky kit and bring the black line pretty close to the sensor. Observe the change in the variable value on the Stage. Note this value.
Then bring the white space close to the sensor. You’ll notice that the value decreases. Note down the new value.The threshold value will be in between these two values. E.g., if the value when the sensor detects the black line is 2000 and when it detects the white space is 500, then we will keep the threshold at 1200.
Repeat the process for the second i.e. the right IR sensor. Note that it is possible for the values of both the sensors to be different.
Getting Feedback via LEDs
Now, to check if the value works fine for our sensors, let’s add a feedback loop, something that will indicate that the sensor has detected the black line.
Add a when flag clicked block from the Events palette.
Go to the Sensorspalette and add a set () IR sensor threshold to () block and write the threshold value you found out above.
Next, add a forever block from the Control palette. We’re using this block because we want to continuously check if the sensor detects the line.
Then, add an if-else block inside the forever block.
Next, go to the Sensors palette and add an is () IR sensor active? block inside the white space of the if-else block. The IR sensor will be active when it detects the black line. This means that its value should be greater than the threshold value. This block will essentially check if the sensor value is greater than the threshold value.
To indicate that the sensor is active, let’s light up one of the LEDs of the dot matrix. From the Displaypalette, add a set LED x () y () to () with brightness () block under the if arm of the if-else block. Set the colour as green from the drop-down by clicking the color circle on the block.
Duplicate the block and drop it under the else arm of the if-else block. Set the color as red. this time.
Calibrating the IR Sensors
Now, run the script by clicking the green flag and bring the black line of the track close to the IR sensor. One of the following three conditions will happen:
Your calibration value is HIGH: The black region will not be detected in this case. Reduce the calibration value.
Your calibration value is LOW: The white region will not be detected in this case. Therefore, increase the calibration value.
Your calibration value is OK. The white and black regions are detected accurately.
Now modify the script to add the detection value for the right IR sensor.
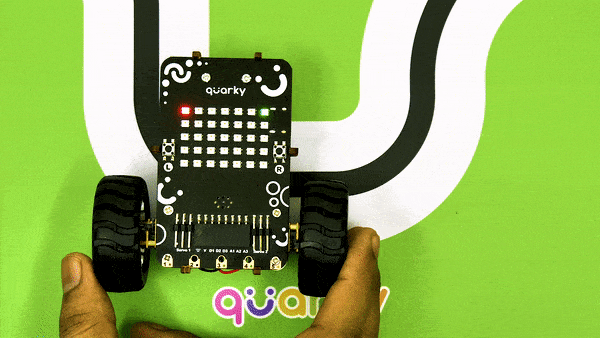
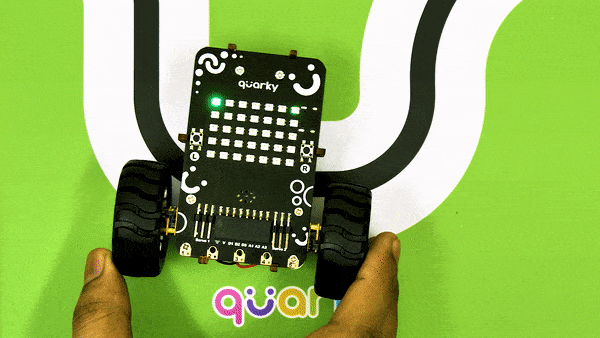
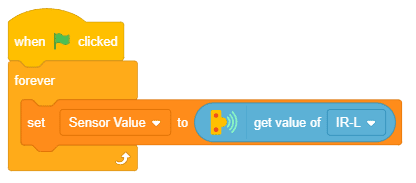
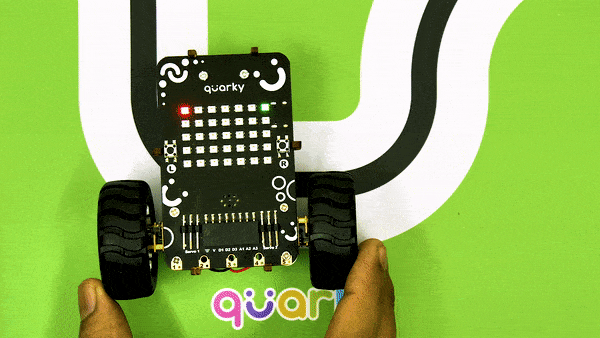
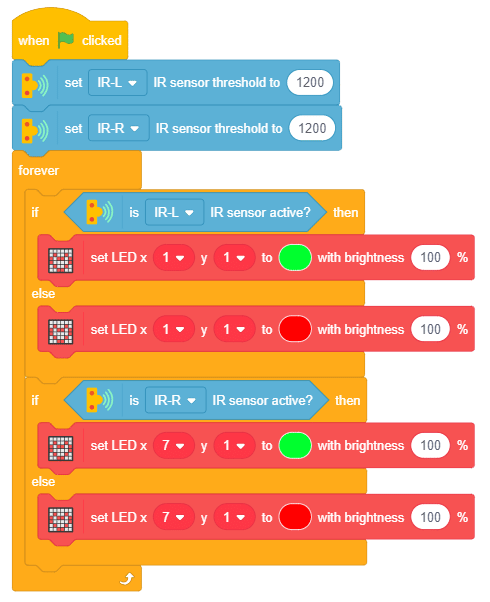
Now, run the script by clicking the green flag and bringing the black line of the track close to the right IR sensor.
Final Testing
Make sure you have the left and the right sensors calibrated properly before you move ahead.
Assignment
Before you move on to the next lesson, a small assignment awaits you!
Submit the project created in the activity as the assignment.
Submitting the assignment is a must in order to receive the certificate after completing the course.
Follow the steps below to upload your assignment:
Click Choose File.
Select the image from the pop-up window that opens up.
Once the image is selected, click Upload Assignment.
The file type allowed is SB3, generated from the PictoBlox program. The maximum file size allowed is 15 MB.