
Actvity 1: Making an AI Assistant
Making an AI Assistant – Overview
Before making our AI assistant, let’s have a quick look at the logic we’ll be applying to make the scripts.
Understanding the Logic
We’re first going to train Quarky to recognize our commands, in this case going to a pharmacy and a clinical lab. We’ll train it in PictoBlox to recognize various commands of similar types such that even if the command that somebody else gives does not exactly match our commands, it will still understand them and perform the corresponding action. For this, we’ll create what is known as a text classifier. A text classifier can analyze any given text and then classify it into a particular category based on its previous knowledge about the categories.
Now let’s write the code using this logic.
Let’s Code
We’re going to use the PictoBlox app to make this script. First, we’re going to make the text classifiers for training Quarky to recognize the different commands.
Collecting the Data
Let’s first make the script for identifying commands for going to the pharmacy. Follow the steps below:
- Open New project in PictoBlox App.
- Go the My Blocks palette and create a block named Add Pharmacy Data.
- To make the text classifier, we need the Natural Language Processing extension. Add the Natural Language Processing extension from the extension palette.
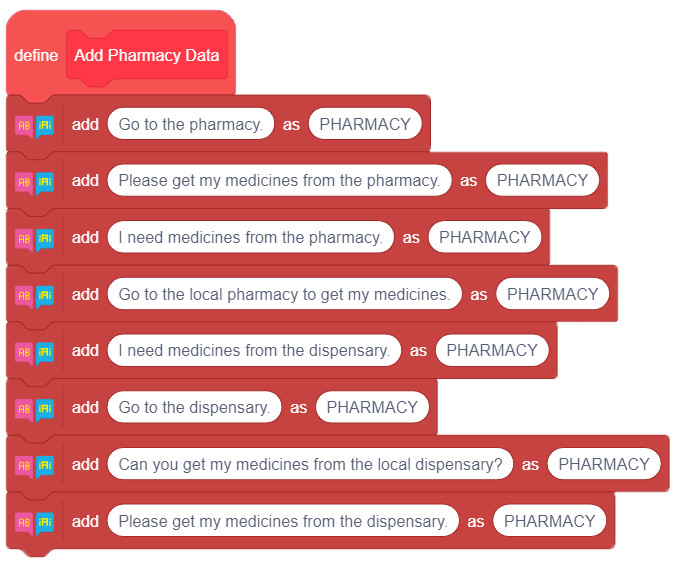
- Take the Add Pharmacy Data hat block and drop an add () as () block from the Natural Language Processing extension below it.
- In place of text in the add () as () block, write the first command, “Go to the pharmacy.”. In place of class, write “PHARMACY”. PHARMACY will be the name of the class. We’re going to give the classifier 7 more commands to add to our class.
- Repeat step 5 seven more times for different commands as shown.
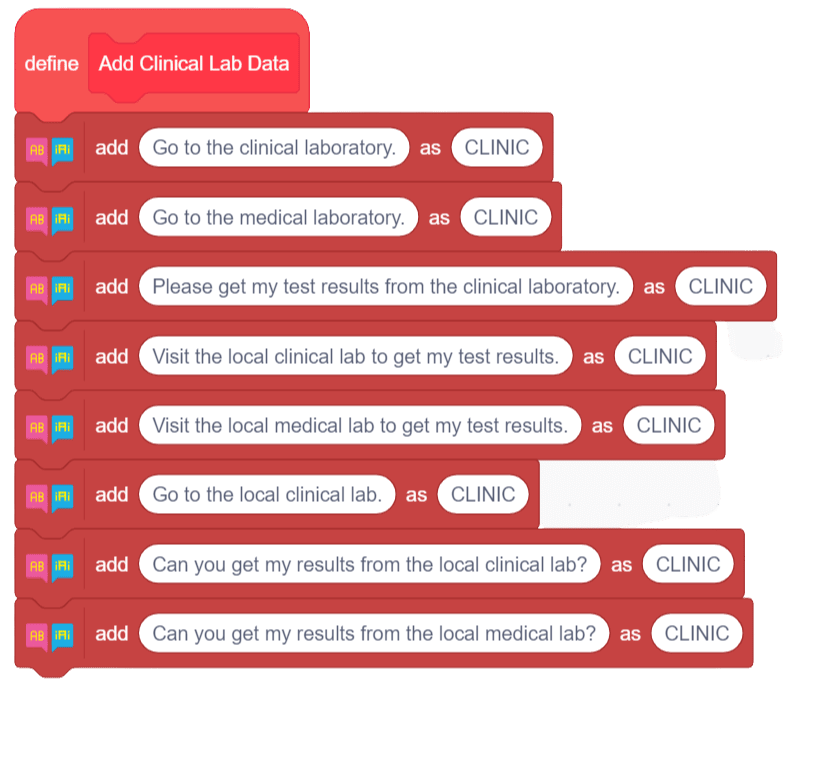
- The steps to make the script for the text classifier for the clinical lab are going to be similar to those for making the text classifier for the pharmacy. All you have to do make an Add Clinic Lab Data block and then follow steps 4 to 6. The script is shown below:
Making the Text Classifier
Now, let’s write the script to train Quarky using these classifiers. Follow the steps below:
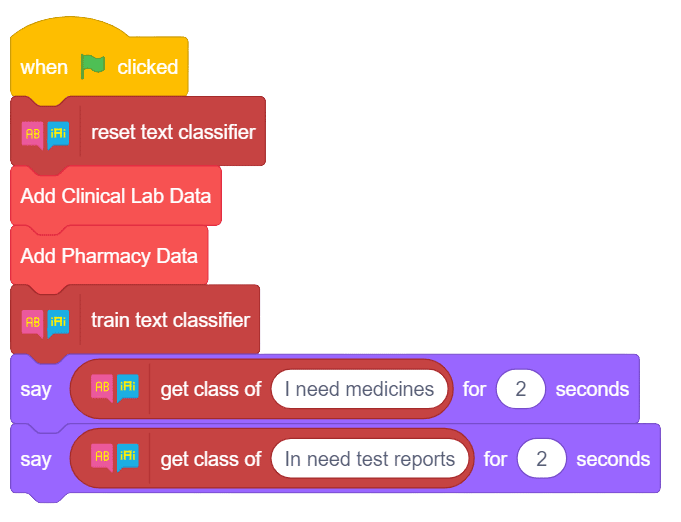
- Add a when flag clicked block into the scripting area.
- Add a reset text classifier block from the Natural Language Processing palette below the when flag clicked block.
- Add the Add Pharmacy Data and Add Clinic Lab Data stack blocks below the reset text classifier block.
- Add a train text classifier block below the Add Pharmacy Data stack block.
- From the Looks palette, add a say () for () seconds block below the train text classifier block. Inside the first space of the say block, drop a get class of () block from the Natural Language Processing palette and write “I need medicines” inside it.
- Repeat step 5 and this time, write “I need test reports” inside the get class of () block.
- Click the green flag to run the script. You’ll see that Tobi correctly identifies the class of the statement entered by you.
Making the AI Assistant
Now that we’ve trained Quarky to classify written instructions, let’s modify our script to train it to classify voice commands and write another to ready its camera and set the parameters for motion.
Follow the steps below:
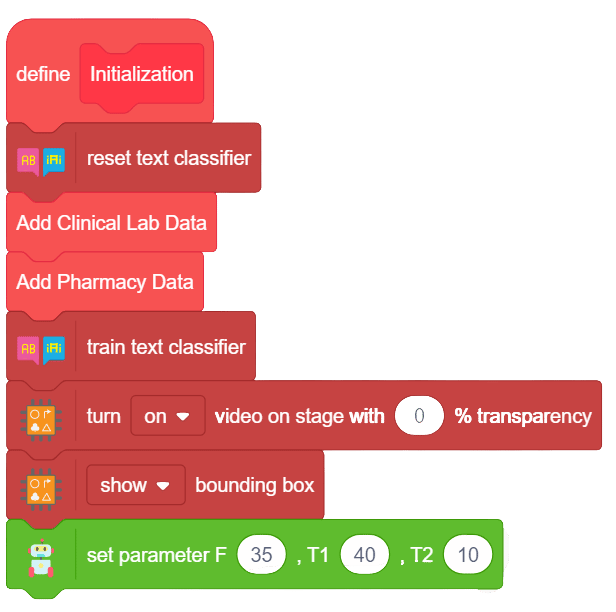
- Go to the My Blocks palette and create a block named Initialization.
- Replace the when flag clicked block of the script that we wrote for training Quarky to classify the commands with the Initialization hat block.
- Replace the two say () for () seconds blocks with a turn () video on stage with () % transparency block from the Autonomous Driving palette. on is set as the default option for the video setting.
- Add a () bounding box block below the turn () video on stage with () % transparency block.
- Add the set parameter F () , T1 (), T2 () block from the Robot palette below the () bounding box block.
Now let’s write the script to train Quarky to classify voice commands.
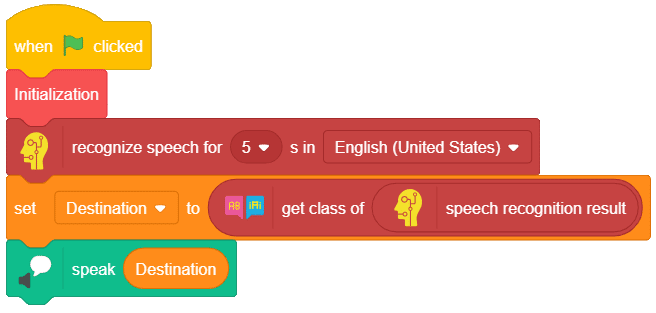
- Add the Initialization stack block below the when flag clicked block.
- Add the Artificial Intelligence extension from the extension palette.
- Add a recognize speech for () s in () block from the Artificial Intelligence palette below the Initialization stack block. Change the time to 2 seconds by selecting 2 from the drop-down.
- Go to the Variables palette and create a variable named Destination we will use it to store the command you give to Quarky.
- Add a set () to () block from the Variables palette below the recognize speech for () s in () block. Since Destination is the only variable we created, it is selected by default from the drop-down.
- Add a get class of () block from the Natural Language Processing palette inside the space of the set () to () block. Inside this block, add a speech recognition result block from the Artificial Intelligence palette.
- To train Quarky to classify voice commands, add the Text-to-Speech extension from the extension palette.
- Add a speak () block from the Text-to-Speech palette. Inside its space, add the Destination variable block.
- Click the green flag and give a voice command to test the script!
In the next activity, we’re going to complete this script for transforming Quarky into an AI assistance bot.