Sign in Sign up
  • Projects
  • Gallery
  • Courses

Looks like you got lost!

We couldn’t find the page you were looking for.

Go Home

Forum Description

Detecting Numbers - Overview

Before we jump in to make our AI delivery bot using Quarky, there are a few concepts that you must understand related to object detection.

All the delivery robots need a way to identify where they are or if they have reached their destination or not. That we will do using number detection. As you can see, in the arena we have 3 checkpoints, we have labeled each checkpoint with a number, like 1, 2, and 3. And to identify the checkpoints, we have used the number cards. We will use this method to identify where the robot is.

Assembling Smartphone Mount

But as you would have noticed we will identify the numbers using our smartphone mounted on the robot. Let's see how to do it.
  1. To mount the Smartphone holders, firstly fix them on Quarky’s front edge. Once the Smartphone holder is fixed in the front, then press on the rear side.
  2. Mount the Smartphone holder lock horizontally across the holder.
  3. Place your Smartphone on the holders horizontally or vertically (use rubber bands to secure it).

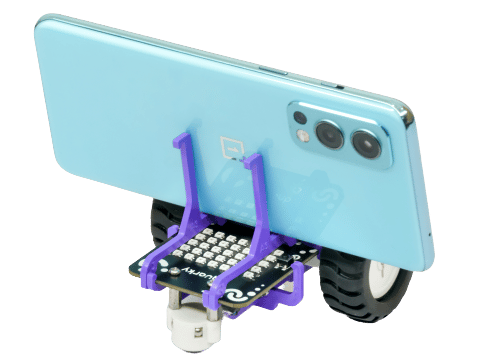
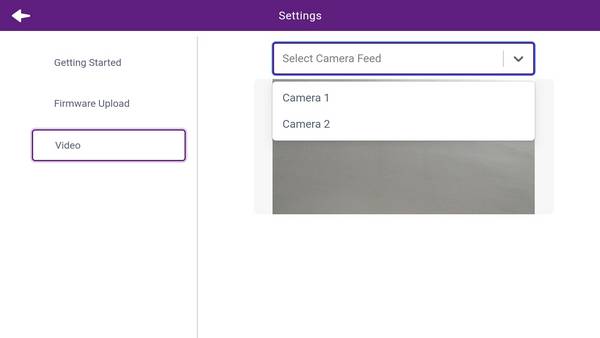
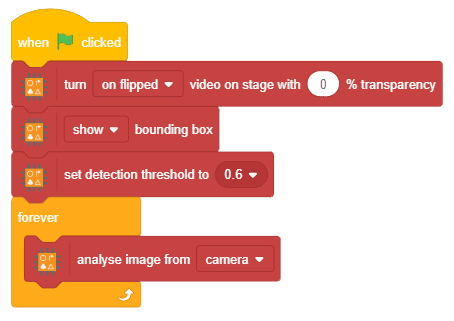
Now, let's see how we can detect the cards using the rear camera of the phone.

Setting up the Camera

Follow the steps to set up your camera for number detection:
  1. Open PictoBlox on your Mobile Phone. Click on the setting button.
  2. Click on the Video tab. Allow the PictoBlox app to take pictures and record videos.
  3. By default, you will have the front camera as the selected camera. You have to click on the dropdown to get the list of all the cameras available on the device.
  4. Select the rear camera.
  5. Click on the back and come back to PictoBlox. Click on Add Extension and add Recognition Cards extension.
  6. Add a when flag clicked block from the Events palette into the scripting area.
  7. Then, add a turn () video on stage with () % transparency block from the Recognition Cards extension and select on flipped from the drop-down. This will turn on the rear camera of your Smartphone.
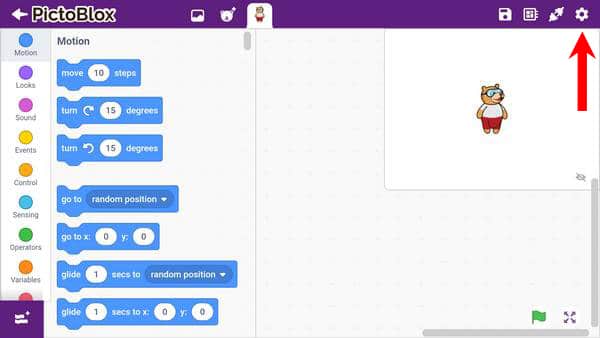
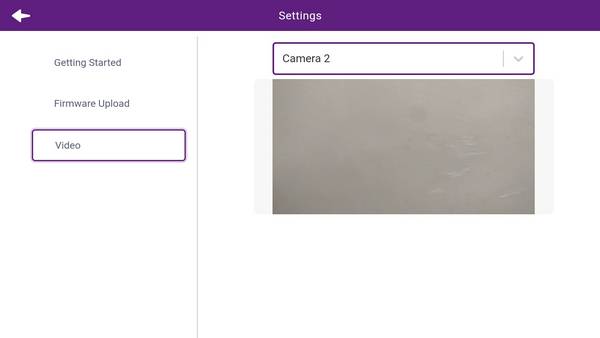
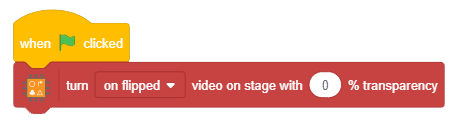
Click on the green flag and your rear camera should start. Make sure this part is working before moving further.

Number Detection - Understanding the Logic

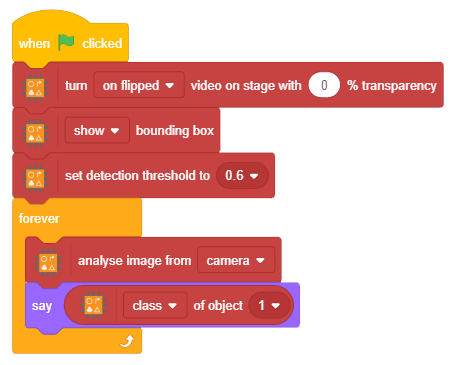
We’ll be using our Smartphone’s camera to detect the numbers. The logic here is pretty simple. We’ll bring a random number in front of the camera and then PictoBlox will detect which number it is. The accuracy with which it will detect the number depends on something called confidence.

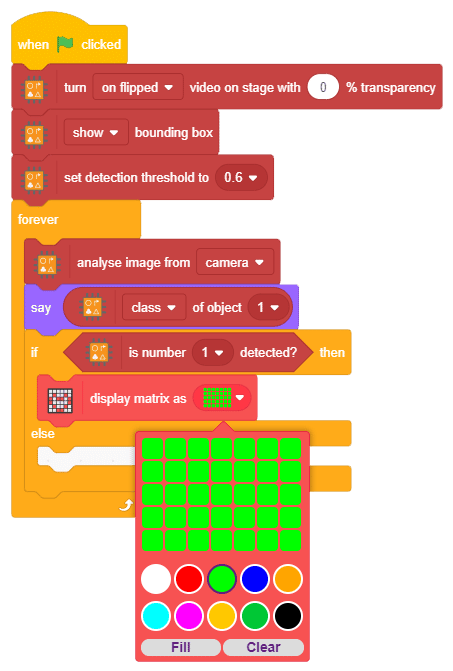
Confidence tells us how sure the machine is of the object it has detected. E.g., let’s say PictoBlox has detected the number 1 and its confidence is 0.6. This means that it is 60% sure that object it has detected is number 1. The accuracy of object detection depends on the confidence value. The higher it is. the more will be the confidence.

The disadvantage of setting a high confidence value is that detecting the objects becomes difficult, especially if it is far away from the camera.

But we cannot keep the confidence value too low either. In that case, the machine may detect some other object or multiple objects at once!

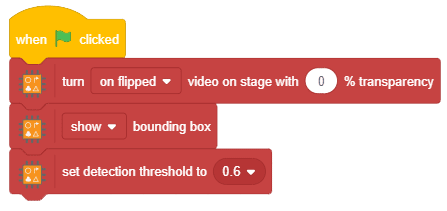
Therefore, we must choose a value that is neither too low nor too high. For this project, we will use confidence as 0.6.

Now, let’s make a script for detecting numbers.

Let's Code!

We’re going to use the PictoBlox app to make this script.
  1. Continue with the last script.
  2. Add a () bounding box block. This will draw a square box every time a number card is detected.
  3. Next, add a set detection threshold to () block. The default value is 0.8. We’re going to set it as 0.6.
  4. The remaining part of the script will be for detecting the numbers. Therefore, we want it to run continuously. For that, we’ll use a forever block. From the Control palette, add a forever block.
  5. Inside the forever block, add an analyse image from () block. This block will detect and analyze the objects the camera sees.
  6. Now, add a say () block from the Looks palette and inside its space, add a () of object () block from the Recognition Cards extension. This block will tell us which number has been detected.
  7. Now, let’s add a feedback system to check if the number 1 has been detected. Add an if-else block from the Control palette and inside the white space of the block, add a is number () detected ? from the Recognition Cards extension. Select number 1 from the drop-down.
  8. If PictoBlox detects the correct number, then we want Quarky’s LED to glow green. Add a display matrix as () block under the if arm from the Display palette and set the colour as green.
  9. If PictoBlox detects an incorrect number, then we want Quarky’s LED to glow red. Add another display matrix as () block under the else arm and set the colour as red.
Now, run the script by clicking the green flag. 
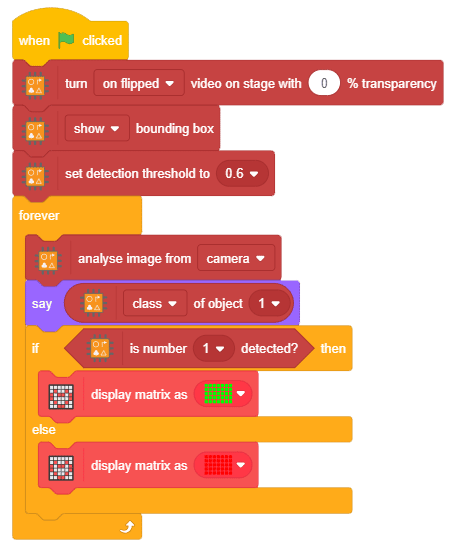
You can also test other conditions like where the robot detects number 1 when multiple cards are present like this: Make sure you have this thing working before moving to the next topic.

Assignment

Before you move on to the next lesson, a small assignment awaits you! Submit the project created in the activity as the assignment. Submitting the assignment is a must in order to receive the certificate after completing the course. Follow the steps below to upload your assignment:
  1. Click Choose File.
  2. Select the image from the pop-up window that opens up.
  3. Once the image is selected, click Upload Assignment.
evive Alert
The file type allowed is SB3, generated from the PictoBlox program. The maximum file size allowed is 15 MB.
Good luck!